Lighting Part II : Fashion Photography
Diary Entry:
This project was long but very successful. I learned to really quicken my pace by working faster or by using two enlargers at a time. By doing this I could work on two prints at the same time, and I would always be busy, never waiting for something to develop. I also gained some more independence when my teacher was absent from school for a week. During this week I often had to make my own judgement call on the quality of my print and whether I should change the settings. I worked fast and was able to produce many prints even though I was working by myself. I didn't have any problems with my prints except some scratches that I hope to be able to fill in soon. During this project I experimented with filters a lot, especially to get more contrast in my clothes pictures. For some of these I used a filter as high as 5!! I'm happy with all of my prints, even though I wish I had a greater variety of clothing for my clothes pictures. My main challenge or this project was to make sure that the viewer understands which item is being 'advertised'. Therefore, for some of these is made the background very dark or increased the contrast to make the item stand out. The best part of this project was when the developer suddenly started to work extremely fast, and pictures developed in less than 15 seconds. Time flew. Keeping up with everything suddenly became a bit harder, but I managed to get four prints done in one lesson. The main reason why I worked fast during this project was that the lighting situations in which I took the pictures were all very similar, so once I got the first couple of prints right, most of the others had similar settings. Something that I should pay more attention two during the next project is minimizing the risk of scratches on my prints by not "stabbing" them while in the solutions, and by being careful when picking them up. The last thing I'd like to work on is getting prints that are more in focus by always using a tripod and making sure that the subject is perfectly in focus.
Theory Notes:
Shooting in Sunlight:
The Sun is the best and least expensive light source: it's free and you never have to carry it around with you! When the Sun is bright, you can get photographs with a lot of contrast, similar to having a hard light. If the Sun isn't as bright, the light will be more diffused and you will get more of a soft light effect. The most important thing to remember whilst shooting outdoors using the Sun is the time of day. Around noon, the Sun is high up in the sky, and the light is shining down onto the subject. This can create problems, such as dark dark shadows on the face of the subject (especially under eyes), and the subjects squinting because the light is too bright. On the other hand, shooting when the sun is low (early morning or late afternoon) will eliminate these problems. The disadvantage with shooting when the sky is low is that the light is mroe diffused and less strong, so there may be a loss of contrast.
To deal with the disadvantages, photographers use some tricks to shoot in bright sunlight. Some may place subjects in a white tent on a very sunny day, resulting in the light being bright and diffused. Others will try to shoot with the bright sunlight behind the subject, to reduce the face shadows and to eliminate any possible squinting.
Shooting in Low Light:
"Low light" is when you have to compensate for the lack of light in a situation. The tricks are the following: One, you could try to use a flash. A good flash (especially if it is external), will light up the subject so that the part of the subject facing it won't have shadows. The farther away your subject is, though, the less effective the flash will be. Two, you can try different shutter speeds. If there is little light, you want a slow shutter speed (1/30 , 1/20 ... depending on the film speed). The slower the film speed, the more light will expose the film. The only problem with this technique is that the shutter speed may to too slow to shoot subjects in movement, and the pictures may come out blurry (a tripod should always be used when working with slow shutter speeds). Three, you can play with the aperture. Just like the shutter speed can be used to expose the film more, the aperture can be opened to let in more light. For this, you can use an open aperture like 2.8. Four, you can use a high ISO. The higher the speed of your film is, the lighter your pictures will be. The only disadvantage with this is that as the film speed increases, the graininess of the picture also does.
Printing Compositions: *click on images to enlarge them*
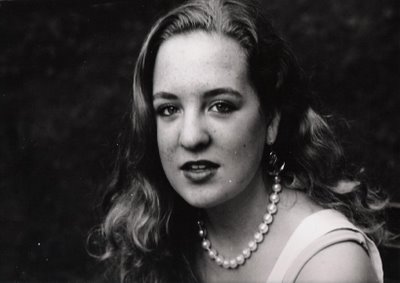
Accessories I: hard light from a lamp
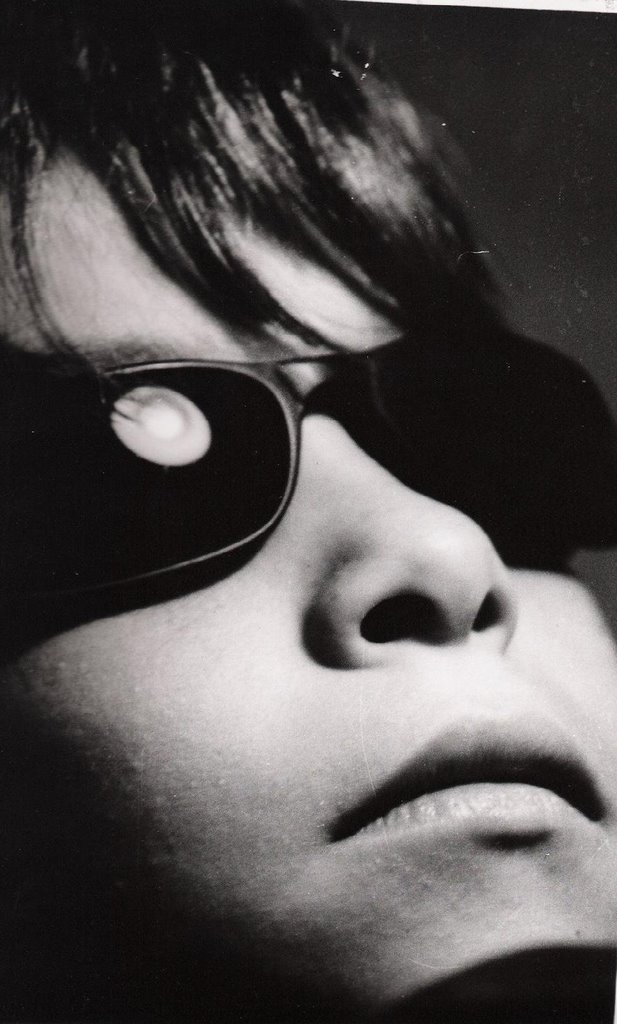
My goal for this print was to get perfect contrast. I knew that in order for the picture to strike the viewer. So when I got a milky result (test strip 1), I immediately increased the time, and kept the other settings. After several trials, I reached the 35-45 seconds, and I liked the contrast, so I printed my final print at 43 seconds (print 1). I was happy with the pitch black background and the marble-like texture of the subject's face. The only detail I would change is the reflection of the lamp in the glasses!
test strip 1: A:8 ; T:17 ; F:3

test strip 2: A:8 ; T:35-40-45 ; F:3

print 1: A:8 ; T:43 ; F:3

Accessories II: low sunlight
For this accessory, I initially started out with a different image. This image, which can be partly seen in test strips 3 and 4, ended up being worst, compositionally, than another one, so I kept my settings and printed the other one. I started with a very grey test strip (test strip 3) [very strange settings..], and after some trials, I found better-looking settings, which were completely different from the ones I started with. A lower time, a smaller aperture, and a medium filter did the trick. But I still wasn't content with the contrast, so I added a higher filter and I slightly increased the time (t.s. 5). I was happy with this test strip, so I kept those settings for my final print (print 2).
test strip 3: A:2.8 ; T:40 ; F:none

test strip 4: A:5.6 ; T:13 ; F:2.5

test strip 5: A:5.6; T:18 ; F:5

print 2: A:5.6 ; T:18 ; F:5
Accessories III: low sunlight
For this print, I started out with a 2.8 aperture and a low time of 8 seconds (test strip 6). I was happy with how it looked, and thought I would get enough contrast. This image went really quickly, and I kept those settings and was done with the final print (print 3) before long.
test strip 6: A:2.8 ; T:8 ; F:none

print 3: A:2.8 ; T:10 ; F:none

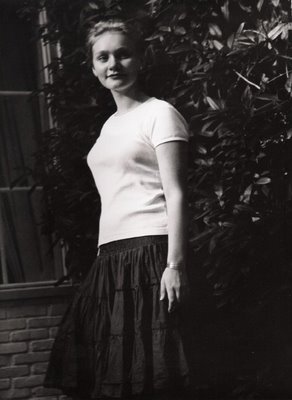
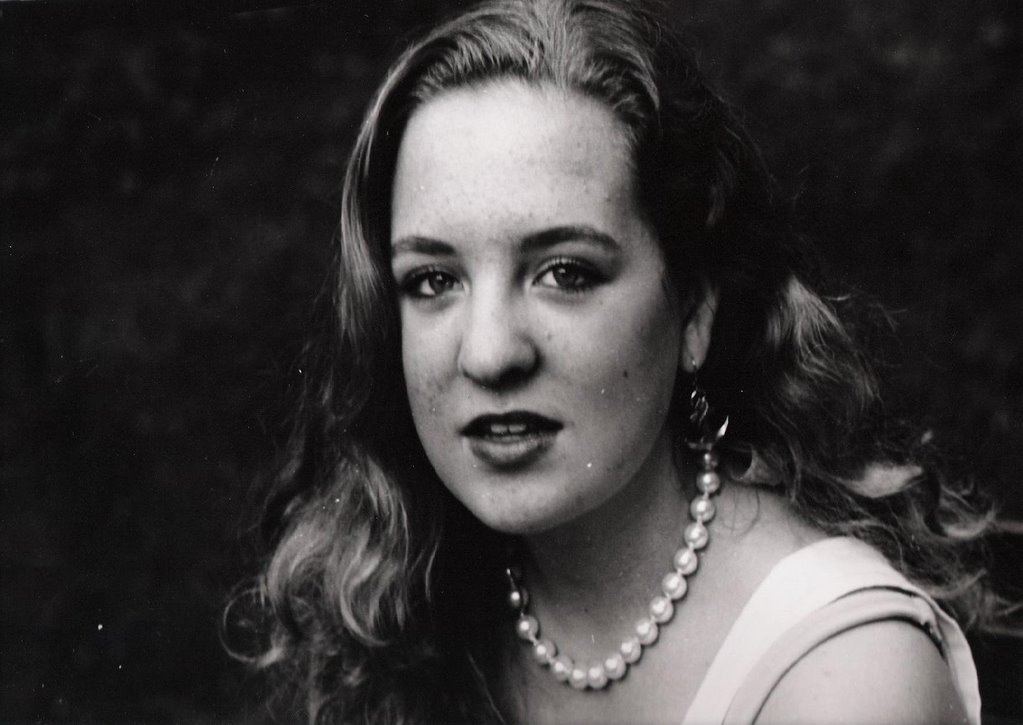
Clothes I: low sunlight
My first attempt was way too gray (test strip 7), so I increased the time to 30 seconds, hoping to get more blacks. What I got was better (t.s. 8), but I increased the aperture to 5.6 and returned to 20 seconds for my final print (print 4), which gave me more contrast. The worst thing about this picture is the background, which is dark grey and boring: couldn't get it to have any more contrast!
test strip 7: A:2.8 ; T:30 ; F:4.5

test strip 8: A:2.8; T:20 ; F:4.5

print 4: A5.6 ; T:20 ; F:4.5

Clothes II: low sunlight
The main problem with this print, like the last one, was the bad background. My goal was to make it dark enough so it wouldn't take the attention away from the subject. My first test strip (test strip 9) was too light, it didn't have enough any black. So I opened the aperture to 5.6 and halved the time to 15... (t.s. 10 after some trials).. but I wanted more details in the shirt so I realized I had to go even darker, to 20 seconds (t.s. 11). I liked these settings the best, so I kept them and slightly lowered the time for my final print (print 5). As I was working on more than one print, I accidentally left this print in the developer for more time, and I got a very dark picture. The, bringing into the light, I realized that the darkness worked to my advantage, blacking out the bacground and putting the subject in focus.
test strip 9: A:8; T:30 ; F:5

test strip 10: A:5.6 ; T:15 ; F:5
test strip 11: A:5.6 ; T:20 ; F:5

print 5: A:5.6 ; T:18 ; F:5 5+ minutes in developer

Clothes III: low sunlight
This picture was taken around 6 in the afternoon. You can see that the sun is low in the sky by noticing the shadows that the trees create. I was worried that this picture would be too dark, but in the end I was happy with the final print. I started out with the same settings as the previous landscape (test strip 14) but I got a picture with way too much white! So I opened up the aperture all the way, kept the same filter and tried different times (t.s. 15) to see if it would improve. For my final print I just increased the time a bit, to 15 seconds, and I was satisfied with the contrast beween the trees and the sky, and with the reflection on the trees in the lake (print 6).
test strip 12: A:5.6 ; T:12 ; F:5

print 6: A:5.6 ; T:16 ; F:5
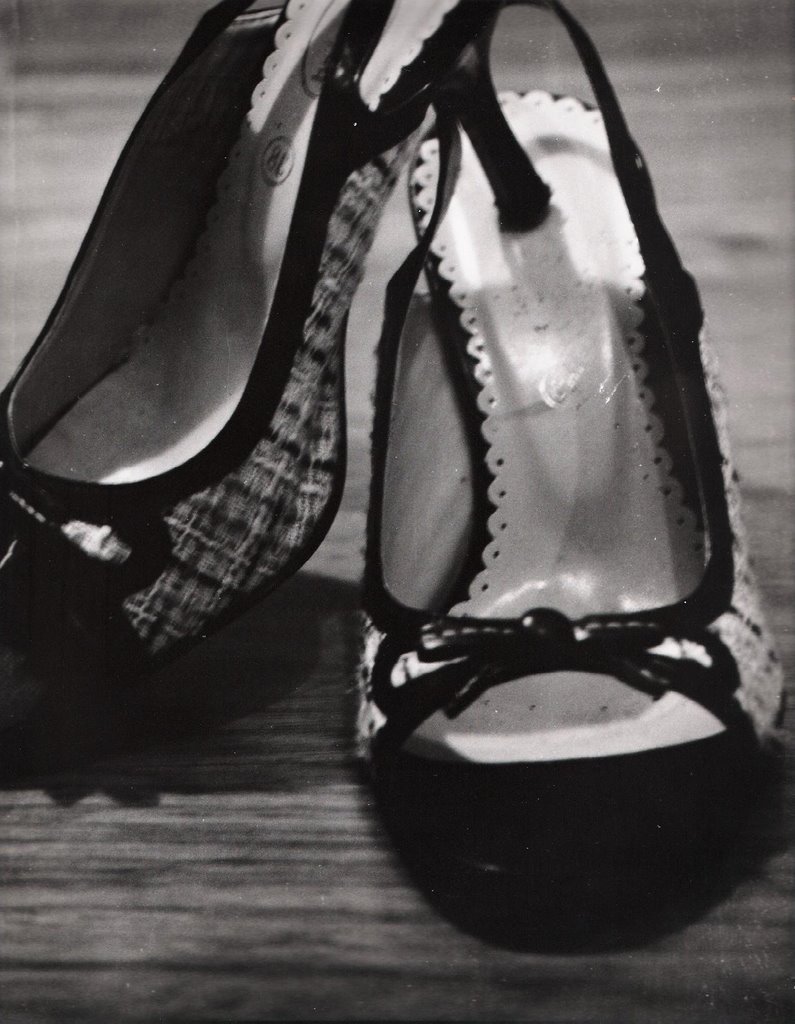
Shoes I: hard light from lamp
This picture was taken around 6 in the afternoon. You can see that the sun is low in the sky by noticing the shadows that the trees create. I was worried that this picture would be too dark, but in the end I was happy with the final print. I started out with the same settings as the previous landscape (test strip 14) but I got a picture with way too much white! So I opened up the aperture all the way, kept the same filter and tried different times (t.s. 15) to see if it would improve. For my final print I just increased the time a bit, to 15 seconds, and I was satisfied with the contrast beween the trees and the sky, and with the reflection on the trees in the lake (print 6).
test strip 13: (both) A:8 ; T:15 ; F:3

print 7: A:8 ; T:12 ; F:3

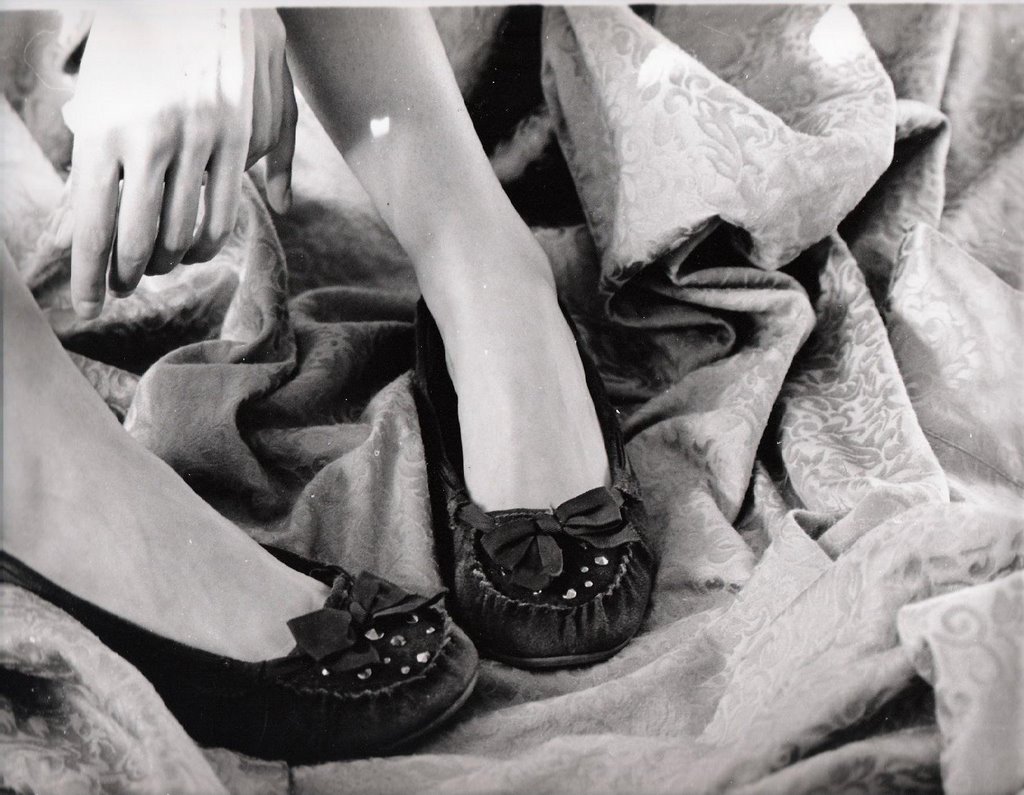
Shoes II: soft sunlight
This picture was taken around 6 in the afternoon. You can see that the sun is low in the sky by noticing the shadows that the trees create. I was worried that this picture would be too dark, but in the end I was happy with the final print. I started out with the same settings as the previous landscape (test strip 14) but I got a picture with way too much white! So I opened up the aperture all the way, kept the same filter and tried different times (t.s. 15) to see if it would improve. For my final print I just increased the time a bit, to 15 seconds, and I was satisfied with the contrast beween the trees and the sky, and with the reflection on the trees in the lake (print 6).
test strip 14: A:5.6; T:6 ; F:2

test strip 15: A:5.6 ; T:7 ; F:2

print 8: A:5.6 ; T:7.5. ; F:2

Shoes III: soft sunlight
This picture was taken around 6 in the afternoon. You can see that the sun is low in the sky by noticing the shadows that the trees create. I was worried that this picture would be too dark, but in the end I was happy with the final print. I started out with the same settings as the previous landscape (test strip 14) but I got a picture with way too much white! So I opened up the aperture all the way, kept the same filter and tried different times (t.s. 15) to see if it would improve. For my final print I just increased the time a bit, to 15 seconds, and I was satisfied with the contrast beween the trees and the sky, and with the reflection on the trees in the lake (print 6).
test strip 16: A:5.6 ; T:7; F:2

print 9: A:5.6 ; T:7 ; F:2

Image Bank:
 http://www.yanickdery.com/
"Untitled" by Yanick Dery.
I love this picture! The lighting is perfect, making the subject more interesting and the dress more appealing. The background chosen is unusual, and therefore grabs the attention of the viewer. The model's pose is also unusual, but it gives the photograph an informal feel, not cold like many fashion photographs are. This picture spreads warmth instead, and makes the viewer curious about what the model is laughing at and pointing at.
About Yanick Dery:
Yanick Dery is a fashion and beauty photographer who has been studying art since he was 16. He has traveled all around the world and has worked for various magazines. He now has a studios in Montreal and in New York, and he now lives in New York.
 http://www.mullerphoto.com/
"Untitled" by Michael Muller
I chose this picture because it's interesting and unique. I like how the water is perfectly in focus and the subject seems like he's in motion. Still, the focus is on the goggles, the accessory being advertised. The colors, even though blurred, make this image special and interesting.
About Michael Muller:
Michael Muller is a talented photographer who captivates viewers by using very unusual poses. His images are usually colorful and upbeat, and he has worked for numerous companies and brands, for example Speedo for this picture. He became famous at 16 with some of his snowboarding images. Since then, he has taken some extraordinary photographs that we may even be familiar with, by seeing them in magazines and advertisements.
 http://www.demarchelier.net/
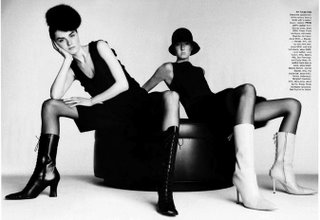
I chose this picture because it is clear what the artist wanted to advertise. The poses are great and the angle from which the artist took the picture makes it, again, unique and interesting. The contrast is good and the composition is capturing. I like the fact that it is black and white instead of color, like usual magazine pictures.
About Patrick Demarchelier:
Patrick Demarchelier is one of the most famous fashion photographers, born in 1943. He started his career in Paris and then moved to New York in 1975. He worked for international and luxurious companies like Tiffany's, Armani, Calvin Klein, L'Oreal, and Chanel, and photographed V.I.P.s such as Princess Diana (he was her official photographer, the only non-british photographer to ever photograph the royal family). Demarchelier worked for top magazines such as Vogue and Harper's Bazaar.
This project was long but very successful. I learned to really quicken my pace by working faster or by using two enlargers at a time. By doing this I could work on two prints at the same time, and I would always be busy, never waiting for something to develop. I also gained some more independence when my teacher was absent from school for a week. During this week I often had to make my own judgement call on the quality of my print and whether I should change the settings. I worked fast and was able to produce many prints even though I was working by myself. I didn't have any problems with my prints except some scratches that I hope to be able to fill in soon. During this project I experimented with filters a lot, especially to get more contrast in my clothes pictures. For some of these I used a filter as high as 5!! I'm happy with all of my prints, even though I wish I had a greater variety of clothing for my clothes pictures. My main challenge or this project was to make sure that the viewer understands which item is being 'advertised'. Therefore, for some of these is made the background very dark or increased the contrast to make the item stand out. The best part of this project was when the developer suddenly started to work extremely fast, and pictures developed in less than 15 seconds. Time flew. Keeping up with everything suddenly became a bit harder, but I managed to get four prints done in one lesson. The main reason why I worked fast during this project was that the lighting situations in which I took the pictures were all very similar, so once I got the first couple of prints right, most of the others had similar settings. Something that I should pay more attention two during the next project is minimizing the risk of scratches on my prints by not "stabbing" them while in the solutions, and by being careful when picking them up. The last thing I'd like to work on is getting prints that are more in focus by always using a tripod and making sure that the subject is perfectly in focus.
Theory Notes:
Shooting in Sunlight:
The Sun is the best and least expensive light source: it's free and you never have to carry it around with you! When the Sun is bright, you can get photographs with a lot of contrast, similar to having a hard light. If the Sun isn't as bright, the light will be more diffused and you will get more of a soft light effect. The most important thing to remember whilst shooting outdoors using the Sun is the time of day. Around noon, the Sun is high up in the sky, and the light is shining down onto the subject. This can create problems, such as dark dark shadows on the face of the subject (especially under eyes), and the subjects squinting because the light is too bright. On the other hand, shooting when the sun is low (early morning or late afternoon) will eliminate these problems. The disadvantage with shooting when the sky is low is that the light is mroe diffused and less strong, so there may be a loss of contrast.
To deal with the disadvantages, photographers use some tricks to shoot in bright sunlight. Some may place subjects in a white tent on a very sunny day, resulting in the light being bright and diffused. Others will try to shoot with the bright sunlight behind the subject, to reduce the face shadows and to eliminate any possible squinting.
Shooting in Low Light:
"Low light" is when you have to compensate for the lack of light in a situation. The tricks are the following: One, you could try to use a flash. A good flash (especially if it is external), will light up the subject so that the part of the subject facing it won't have shadows. The farther away your subject is, though, the less effective the flash will be. Two, you can try different shutter speeds. If there is little light, you want a slow shutter speed (1/30 , 1/20 ... depending on the film speed). The slower the film speed, the more light will expose the film. The only problem with this technique is that the shutter speed may to too slow to shoot subjects in movement, and the pictures may come out blurry (a tripod should always be used when working with slow shutter speeds). Three, you can play with the aperture. Just like the shutter speed can be used to expose the film more, the aperture can be opened to let in more light. For this, you can use an open aperture like 2.8. Four, you can use a high ISO. The higher the speed of your film is, the lighter your pictures will be. The only disadvantage with this is that as the film speed increases, the graininess of the picture also does.
Printing Compositions: *click on images to enlarge them*
Accessories I: hard light from a lamp
My goal for this print was to get perfect contrast. I knew that in order for the picture to strike the viewer. So when I got a milky result (test strip 1), I immediately increased the time, and kept the other settings. After several trials, I reached the 35-45 seconds, and I liked the contrast, so I printed my final print at 43 seconds (print 1). I was happy with the pitch black background and the marble-like texture of the subject's face. The only detail I would change is the reflection of the lamp in the glasses!
test strip 1: A:8 ; T:17 ; F:3
test strip 2: A:8 ; T:35-40-45 ; F:3

print 1: A:8 ; T:43 ; F:3
Accessories II: low sunlight
For this accessory, I initially started out with a different image. This image, which can be partly seen in test strips 3 and 4, ended up being worst, compositionally, than another one, so I kept my settings and printed the other one. I started with a very grey test strip (test strip 3) [very strange settings..], and after some trials, I found better-looking settings, which were completely different from the ones I started with. A lower time, a smaller aperture, and a medium filter did the trick. But I still wasn't content with the contrast, so I added a higher filter and I slightly increased the time (t.s. 5). I was happy with this test strip, so I kept those settings for my final print (print 2).
test strip 3: A:2.8 ; T:40 ; F:none

test strip 4: A:5.6 ; T:13 ; F:2.5
test strip 5: A:5.6; T:18 ; F:5

print 2: A:5.6 ; T:18 ; F:5
Accessories III: low sunlight
For this print, I started out with a 2.8 aperture and a low time of 8 seconds (test strip 6). I was happy with how it looked, and thought I would get enough contrast. This image went really quickly, and I kept those settings and was done with the final print (print 3) before long.
test strip 6: A:2.8 ; T:8 ; F:none

print 3: A:2.8 ; T:10 ; F:none

Clothes I: low sunlight
My first attempt was way too gray (test strip 7), so I increased the time to 30 seconds, hoping to get more blacks. What I got was better (t.s. 8), but I increased the aperture to 5.6 and returned to 20 seconds for my final print (print 4), which gave me more contrast. The worst thing about this picture is the background, which is dark grey and boring: couldn't get it to have any more contrast!
test strip 7: A:2.8 ; T:30 ; F:4.5

test strip 8: A:2.8; T:20 ; F:4.5

print 4: A5.6 ; T:20 ; F:4.5

Clothes II: low sunlight
The main problem with this print, like the last one, was the bad background. My goal was to make it dark enough so it wouldn't take the attention away from the subject. My first test strip (test strip 9) was too light, it didn't have enough any black. So I opened the aperture to 5.6 and halved the time to 15... (t.s. 10 after some trials).. but I wanted more details in the shirt so I realized I had to go even darker, to 20 seconds (t.s. 11). I liked these settings the best, so I kept them and slightly lowered the time for my final print (print 5). As I was working on more than one print, I accidentally left this print in the developer for more time, and I got a very dark picture. The, bringing into the light, I realized that the darkness worked to my advantage, blacking out the bacground and putting the subject in focus.
test strip 9: A:8; T:30 ; F:5

test strip 10: A:5.6 ; T:15 ; F:5

test strip 11: A:5.6 ; T:20 ; F:5

print 5: A:5.6 ; T:18 ; F:5 5+ minutes in developer

Clothes III: low sunlight
This picture was taken around 6 in the afternoon. You can see that the sun is low in the sky by noticing the shadows that the trees create. I was worried that this picture would be too dark, but in the end I was happy with the final print. I started out with the same settings as the previous landscape (test strip 14) but I got a picture with way too much white! So I opened up the aperture all the way, kept the same filter and tried different times (t.s. 15) to see if it would improve. For my final print I just increased the time a bit, to 15 seconds, and I was satisfied with the contrast beween the trees and the sky, and with the reflection on the trees in the lake (print 6).
test strip 12: A:5.6 ; T:12 ; F:5

print 6: A:5.6 ; T:16 ; F:5

Shoes I: hard light from lamp
This picture was taken around 6 in the afternoon. You can see that the sun is low in the sky by noticing the shadows that the trees create. I was worried that this picture would be too dark, but in the end I was happy with the final print. I started out with the same settings as the previous landscape (test strip 14) but I got a picture with way too much white! So I opened up the aperture all the way, kept the same filter and tried different times (t.s. 15) to see if it would improve. For my final print I just increased the time a bit, to 15 seconds, and I was satisfied with the contrast beween the trees and the sky, and with the reflection on the trees in the lake (print 6).
test strip 13: (both) A:8 ; T:15 ; F:3

print 7: A:8 ; T:12 ; F:3
Shoes II: soft sunlight
This picture was taken around 6 in the afternoon. You can see that the sun is low in the sky by noticing the shadows that the trees create. I was worried that this picture would be too dark, but in the end I was happy with the final print. I started out with the same settings as the previous landscape (test strip 14) but I got a picture with way too much white! So I opened up the aperture all the way, kept the same filter and tried different times (t.s. 15) to see if it would improve. For my final print I just increased the time a bit, to 15 seconds, and I was satisfied with the contrast beween the trees and the sky, and with the reflection on the trees in the lake (print 6).
test strip 14: A:5.6; T:6 ; F:2

test strip 15: A:5.6 ; T:7 ; F:2

print 8: A:5.6 ; T:7.5. ; F:2
Shoes III: soft sunlight
This picture was taken around 6 in the afternoon. You can see that the sun is low in the sky by noticing the shadows that the trees create. I was worried that this picture would be too dark, but in the end I was happy with the final print. I started out with the same settings as the previous landscape (test strip 14) but I got a picture with way too much white! So I opened up the aperture all the way, kept the same filter and tried different times (t.s. 15) to see if it would improve. For my final print I just increased the time a bit, to 15 seconds, and I was satisfied with the contrast beween the trees and the sky, and with the reflection on the trees in the lake (print 6).
test strip 16: A:5.6 ; T:7; F:2

print 9: A:5.6 ; T:7 ; F:2

Image Bank:
 http://www.yanickdery.com/
"Untitled" by Yanick Dery.
I love this picture! The lighting is perfect, making the subject more interesting and the dress more appealing. The background chosen is unusual, and therefore grabs the attention of the viewer. The model's pose is also unusual, but it gives the photograph an informal feel, not cold like many fashion photographs are. This picture spreads warmth instead, and makes the viewer curious about what the model is laughing at and pointing at.
About Yanick Dery:
Yanick Dery is a fashion and beauty photographer who has been studying art since he was 16. He has traveled all around the world and has worked for various magazines. He now has a studios in Montreal and in New York, and he now lives in New York.
 http://www.mullerphoto.com/
"Untitled" by Michael Muller
I chose this picture because it's interesting and unique. I like how the water is perfectly in focus and the subject seems like he's in motion. Still, the focus is on the goggles, the accessory being advertised. The colors, even though blurred, make this image special and interesting.
About Michael Muller:
Michael Muller is a talented photographer who captivates viewers by using very unusual poses. His images are usually colorful and upbeat, and he has worked for numerous companies and brands, for example Speedo for this picture. He became famous at 16 with some of his snowboarding images. Since then, he has taken some extraordinary photographs that we may even be familiar with, by seeing them in magazines and advertisements.
 http://www.demarchelier.net/
I chose this picture because it is clear what the artist wanted to advertise. The poses are great and the angle from which the artist took the picture makes it, again, unique and interesting. The contrast is good and the composition is capturing. I like the fact that it is black and white instead of color, like usual magazine pictures.
About Patrick Demarchelier:
Patrick Demarchelier is one of the most famous fashion photographers, born in 1943. He started his career in Paris and then moved to New York in 1975. He worked for international and luxurious companies like Tiffany's, Armani, Calvin Klein, L'Oreal, and Chanel, and photographed V.I.P.s such as Princess Diana (he was her official photographer, the only non-british photographer to ever photograph the royal family). Demarchelier worked for top magazines such as Vogue and Harper's Bazaar.